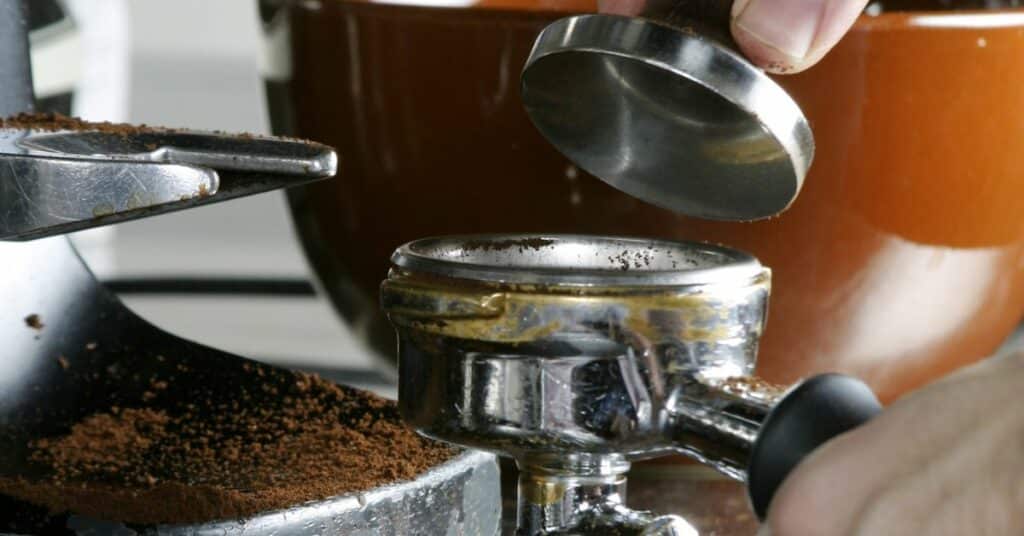
As someone who loves espresso, I’ve found that tamping makes some of the biggest differences in how espresso extracts and tastes.
Hence, I find it critical to know why correct tamping is essential.
I’ll cover the following points throughout this piece:
Read on to learn more.
Key Takeaways
- Flat tampers are easier to use & produce better results for beginners.
- Level & break down the coffee grounds before tamping.
- Apply 15 then 20–30 pounds of pressure when tamping.
- Make sure that the surface is level & free of any gaps or spaces.
How to Tamp Espresso Like a Pro

What you will need:
- Grinder
- Tamper
- Coffee scale
- Portafilter
- Coffee tamping matt (optional)
- Beans
- Single shot: 7–9 grams
- Double shot: 14–18 grams
These sections will emphasize on the following steps to tamp your espresso beans:
- Choosing the tamper
- Leveling grounds
- Setting up your form
- Apply pressure
- Inspect puck
Ensure you follow all the steps and tips to avoid the potential of espresso channeling. A phenomenon that could make your espresso taste too sour or bitter.
Keep reading to learn more.
1. Choose Your Tamper
If you already bought your tamper, skip to step 2. Otherwise, you’ll need to know whether convex or flat tampers are better. In short, beginners should opt for flat tampers. Those suffering from constant espresso channeling should go for convex ones.
However:
Those suffering from constant espresso channeling have several other ways to fix it without sacrificing taste. For instance, ensure you grind beans to 0.3 mm and have more consistency when grinding [1].
Let’s dive into the differences between the 2 if you haven’t decided, yet.
Flat vs. Convex Tampers
Here’s a breakdown on the differences between the 2:
| Tamper | Flat | Convex |
| Taste | Better | Not as good |
| Shape | Flat | Rounded |
| Extraction | More | Less |
| Beginner-friendly? | Yes | No |
| Channeling Prevention | Worse | Better |
A study I found suggested that flat tampers have a better extraction rate. They also have more Total Dissolvable Solids (TDS) than convex tampers [2]. They’re also more beginner-friendly since you don’t need to worry about how you’re tamping the sides of your portafilter basket.
Though, the leveled sides could reduce espresso channeling. But as mentioned, there are plenty of other ways to reduce this.
Convex tampers also result in thinner centers in espresso pucks, which could result in quicker extraction.
Flat tampers are also much easier to find than convex ones. I had difficulty finding convex tampers online when I considered buying one.
Now, it’s time to level your grounds.
2. Level & Break Down Coffee Grounds
Prevent espresso channeling by using a paperclip or WDT tool to break down any chunks of coffee grounds within your espresso puck. A WDT tool acts like a rake and will help even your espresso.
Once you break down your grounds, run a finger across the top of your portafilter basket to scrape away excess grounds.
We’re almost to the tamping part. First, you need to set up a good form.
3. Set up Your Form
Set up your form by following these steps:
- Place your tamper on a flat, level surface (e.g., countertop).
- Having a tamping matt here will prevent you from damaging your countertop & will mitigate messes.
- Press your hip against your counter.
- Use the same side as the hand you’re holding the portafilter in.
- E.g., portafilter in left hand means you press the left side of your hip against the counter.
- Straighten your wrist & bend your elbow at a 90-degree-angle.
- Helps power come from your body, rather than wrist.
- Hold the tamper like a doorknob; with your index finger & thumb touching the base.
Following these steps to improve your form will reduce the chance of repetitive stress injuries and will ensure you get the best tamp.
Now, we’ll apply pressure.
4. Apply Pressure
Place the tamper inside the portafilter basket and apply 15 pounds of pressure. This will help begin to form a puck shape. And once you have a puck, apply 20–30 pounds of force to create a sturdy, compact puck.
When pressing, ensure the tamper remains level. Otherwise, you risk espresso channeling.
That range of numbers sounds vague, but it’s what baristas recommend. Experiment with different numbers—20, 21, 22, etc.— until you find one that makes your espresso taste best.
How do you tell how much pressure you’re exerting?
Stand on a bathroom scale and press down on your counter. Keep pressing until you see your weight decrease by 15 or 20–30 pounds [3]. A calibrated tamper will also tell you how much pressure you’re applying.
How Hard Should You Tamp Espresso?
Most baristas recommend applying between 20 and 30 pounds of pressure. This is enough to create a dense and even puck that will produce a consistent and well-extracted shot.
Ensure that you did a good job applying pressure.
5. Inspect Puck
Lift the tamper and inspect your puck’s surface. You should see a level surface with no spaces and gaps. If you see loose grounds in or around your portafilter basket, scrape them off. Doing so will reduce the likelihood of espresso channeling.
It’ll also protect your portafilter gasket and reduce the chance of machine maintenance.
That’s all for tamping. But what if you don’t have a tamper?
How to Tamp Espresso Without a Tamper
To tamp espresso without a tamper, you can use a variety of different objects, such as:
- Spoon: Press down on the coffee grounds in the portafilter.
- Make sure to apply even pressure & to tamp the grounds all the way to the edges of the portafilter.
- Pestle: Hold it vertically & press it down on the coffee grounds.
- Shot glass: Place the shot glass upside down on the portafilter & press down firmly.
None of these “tools” are designed to fit the parameters of portafilter baskets. Hence, you risk uneven distribution. And with uneven distribution, you risk espresso channeling. If your drink tastes bitter or sour, know it’s likely because you used one of these tools.
I might have missed something when describing how to tamp. Let’s see in the tips.
Tamping Espresso Tips
Here are some tips for tamping espresso:
- Use a level surface: Helps ensure that the coffee grounds are evenly distributed.
- Use a firm but gentle touch: Don’t tamp too hard, as this can create channels in the coffee grounds.
- Tamp in a circular motion: This will help to create a uniform tamp.
- Level grounds: Tamp until the coffee grounds are level with the top of the portafilter.
- Wipe away any excess coffee grounds: This will help to prevent the coffee from sticking to the sides of the portafilter.
What exactly is tamping?
What is Tamping?
Espresso tamping is the process of compressing the ground coffee in the portafilter of an espresso machine. Do this using a tamper, a flat or round tool slightly smaller than the diameter of the portafilter basket.
Tamping is an important step in the espresso brewing process because it helps create a uniform and consistent resistance to the water flow. This is essential for producing a well-extracted shot of espresso.
FAQs for Tamping Espresso
Read on and you’ll find frequently asked questions about tamping espresso throughout the following sections.
Why Do You Tamp Espresso?
You tamp espresso to create a uniform bed of coffee grounds that is resistant to channeling. Channeling is when water flows through the coffee grounds unevenly, resulting in a weak or sour shot of espresso.
What Happens if You Tamp Espresso Too Hard?
If you tamp espresso too hard, you can create channels in the coffee grounds. These channels are small gaps that allow water to flow through the coffee grounds more easily. This can lead to uneven extraction.
Conclusion
Use a good form when tamping espresso to prevent injuries and ensure you get the most even espresso puck. Also ensure you apply light pressure (15 pounds) at first. Then 20–30 pounds afterward. Doing so results in a more condensed puck.
Want to learn more about making espresso? Check out our other guides.


